Let’s take a look at a house that’s ready for sheetrock. Let’s do some best practices for sheetrock preparation, focusing on the framing members, we’ll look at corners and tees make sure they’re blocked properly, we’ll look at the plane of the wall for the studs, and let’s look at some joists to make sure they’re blocked in properly. And I want to show this to you so we’ll be ready for the drywall when it comes in, in a few days.
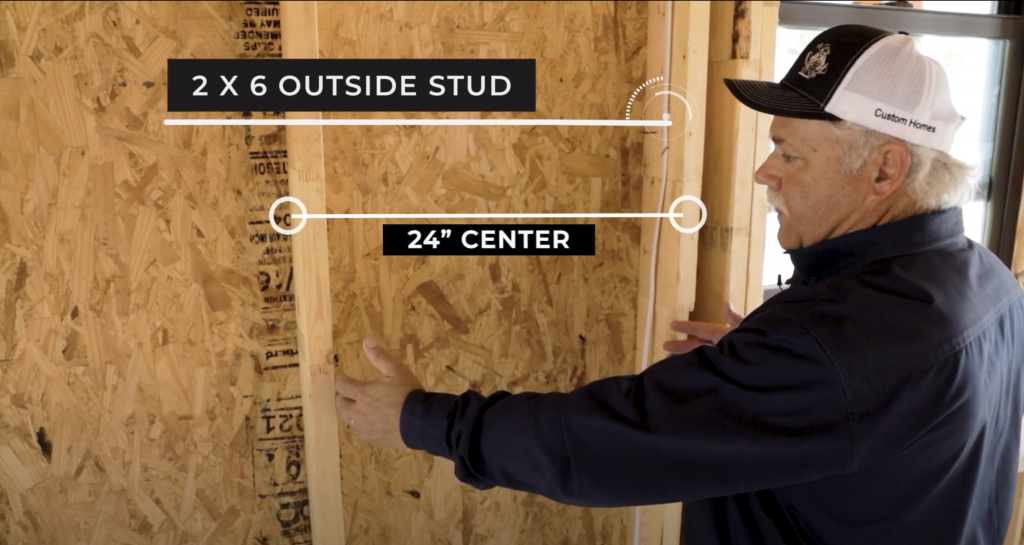
This home has a lot of qualities of a high-performance home, a few that I want to point out is that you have a 2×6 outside wall and the studs that are 24-inch center that gives you 33% more insulation than a 2×4 outside wall. The next thing we have, if you look up to the header, you have a cavity for the foam to go into above the header, cutting down the thermal transfer temperature from the outside to the inside. Same thing with the corners if you see my hand coming around the corner we have room for the foam coming around the back side then you have a 2×4 inside wall, this wall’s on a 16-inch center so you can see the difference between the spacing of the studs on the inside wall versus the stud space on the outside wall.
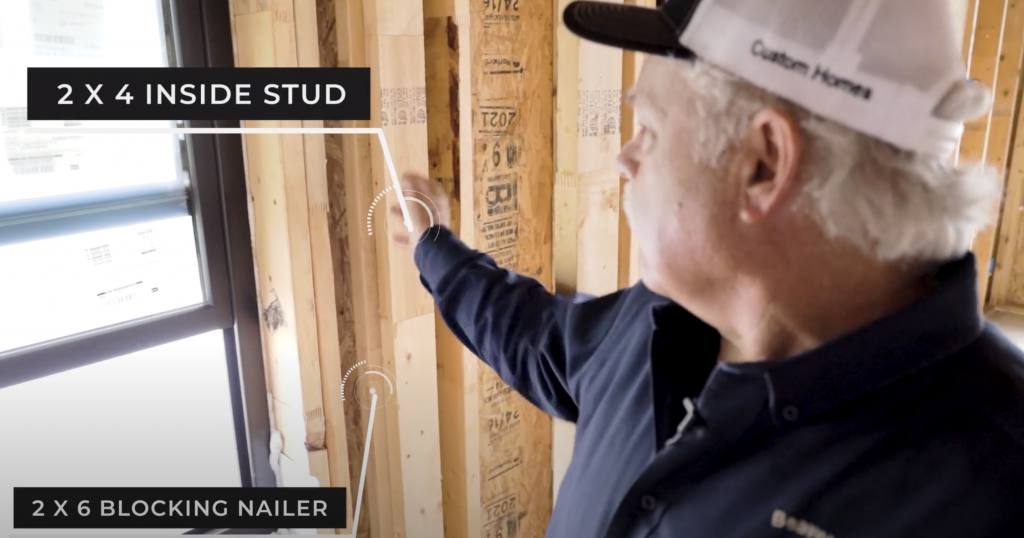
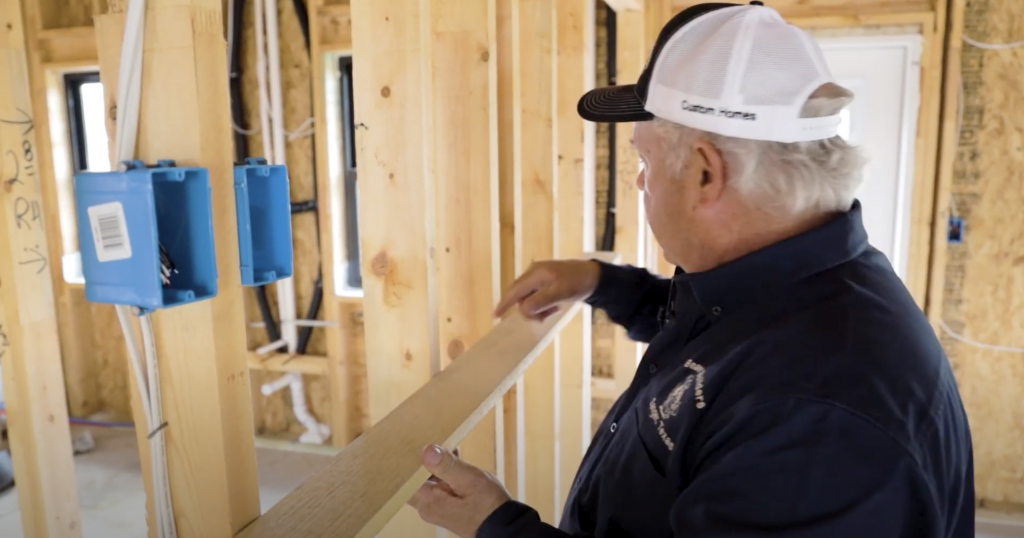
I want to do is demonstrate some ways to verify that the wall is going to flow straight across the plane of the sheetrock. The main thing is make sure that the framing members are straight, they plumb and aligned it when they frame the house, but what happens when the wall stud goes to warping on you? A good way to check this is with some kind of straight material on the job site and check your studs by lay it against the wall. You can see which studs are lined up good if you have one that’s way out go ahead and mark it, and you can adjust accordingly, but you can take this along all the walls of the house inside walls and outside walls, and look for anything that’s out of plum.
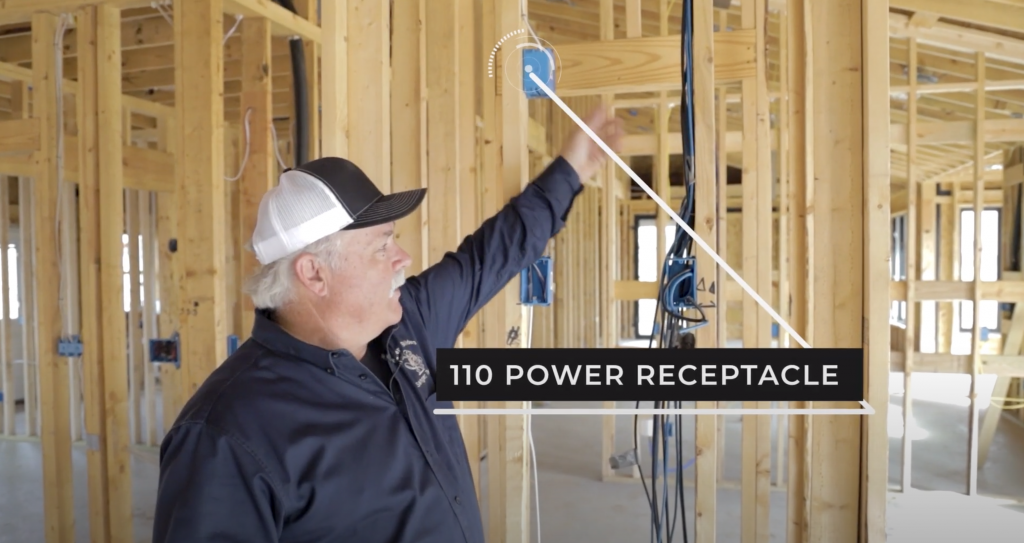
Another thing to remember before you sheetrock make sure all your media wires come to one location. So you get them all hooked up, but also important, make sure you have a 110 to plug your media equipment into. Your media wires come to one location your 110 comes to the same location, that way when down the road, you’re not having to bust a bunch of sheetrock out to fix this stuff.
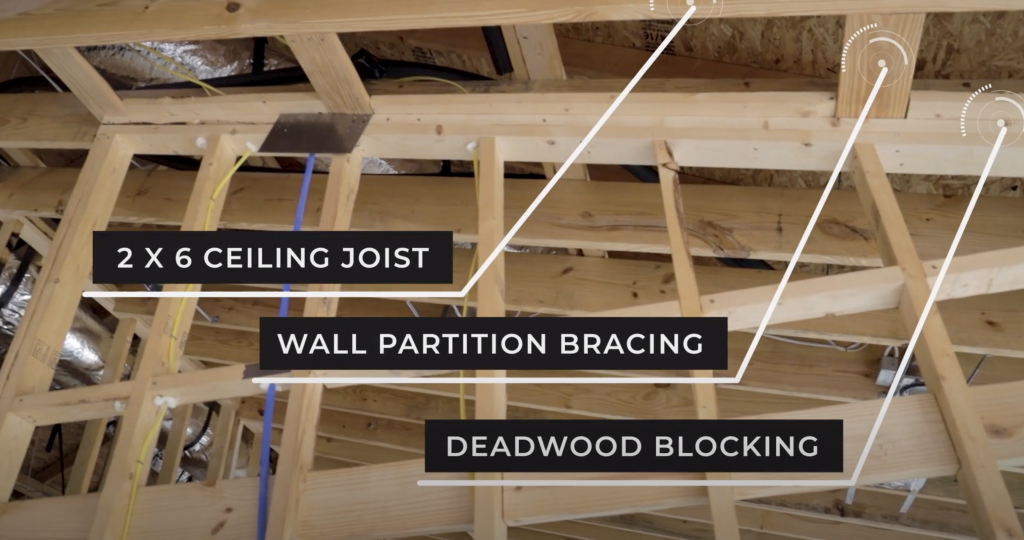
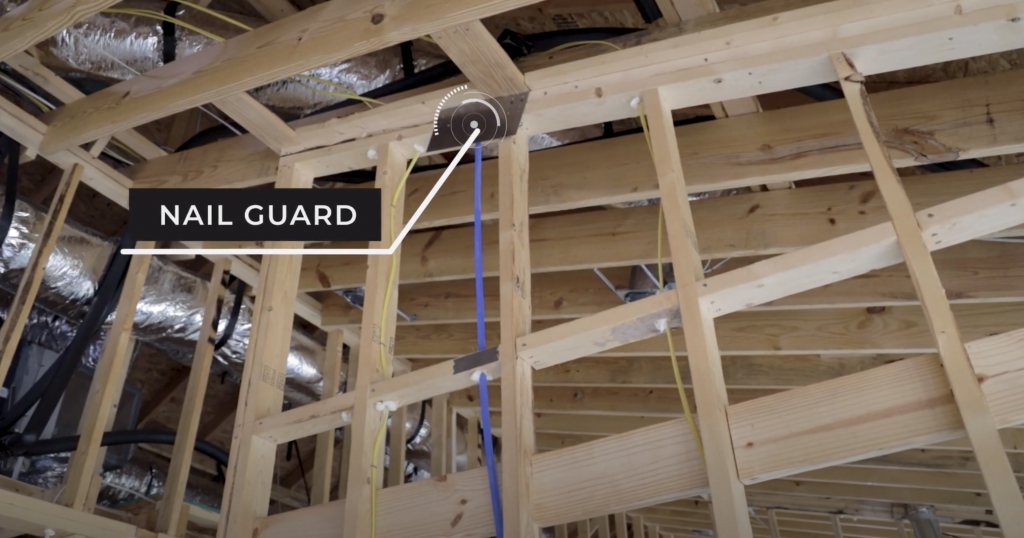
Some more things you want to be looking out for prior to sheet rocking is on your framework. Whenever you have a wall going parallel with your joist look up top and make sure you have the dead wood blocking on top of your wall. Think about how the sheetrock comes to the wall you want to make sure you have something another shear out to on the top part of the wall. The next thing you want to look at is our nail plates up on top, make sure the nail plate goes plain with the wall, if it buckles out you can have buckling sheet rock, especially in the corner and it’s going to be very obvious.
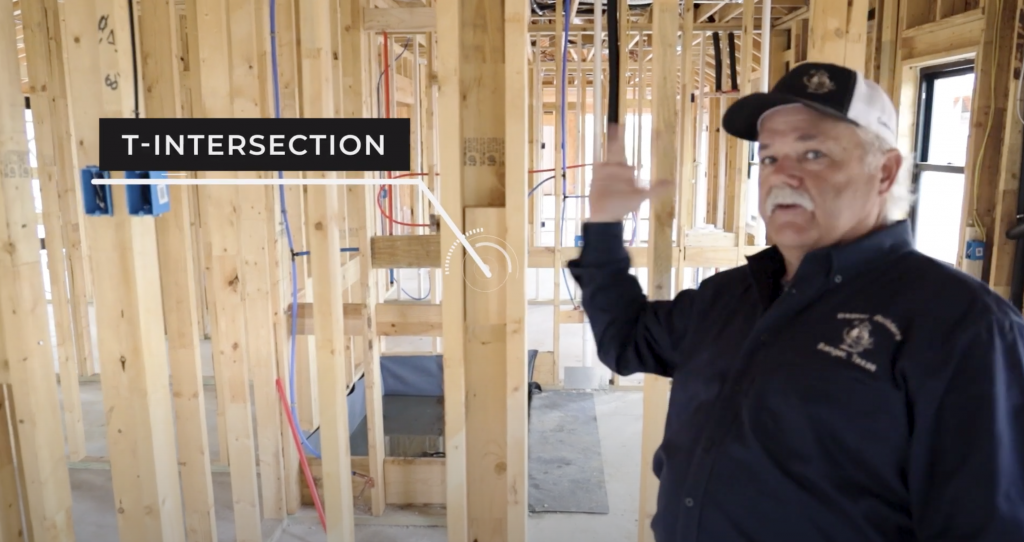
Anywhere you have a wall intersecting with the long wall on the house you’re going to have a tee. I’ve got a tee going that way with the wall and then a wall going this way that forms a tee you want to make real sure that you have proper blocking top middle and bottom for that tee. What that does it stabilizes that tee to help the sheer rock from cracking out on the inside corner.
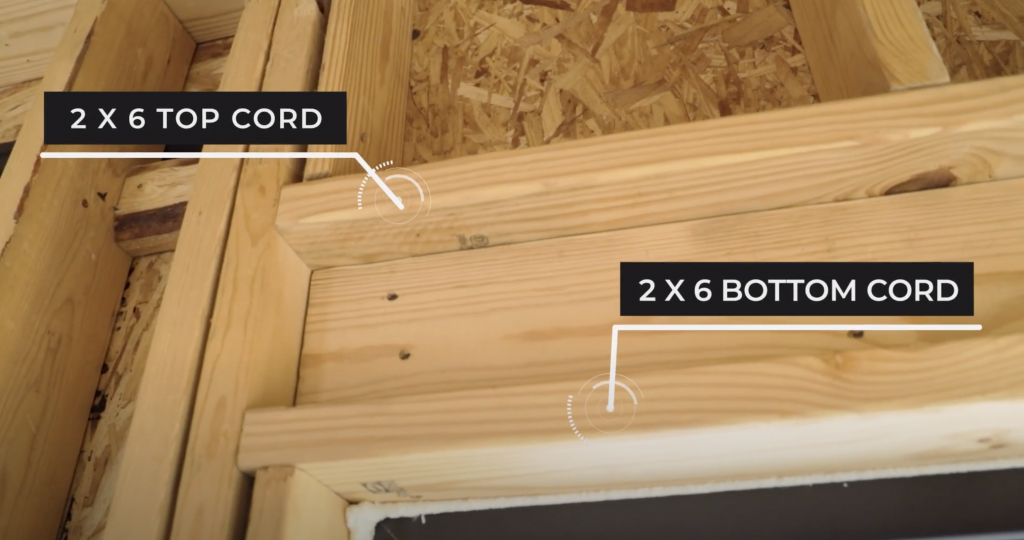
Make sure when you’re walking around all your windows and outside doors that the headers have blocking on top and bottom so the sheetrock can come down and make the corner and have something to nail to.
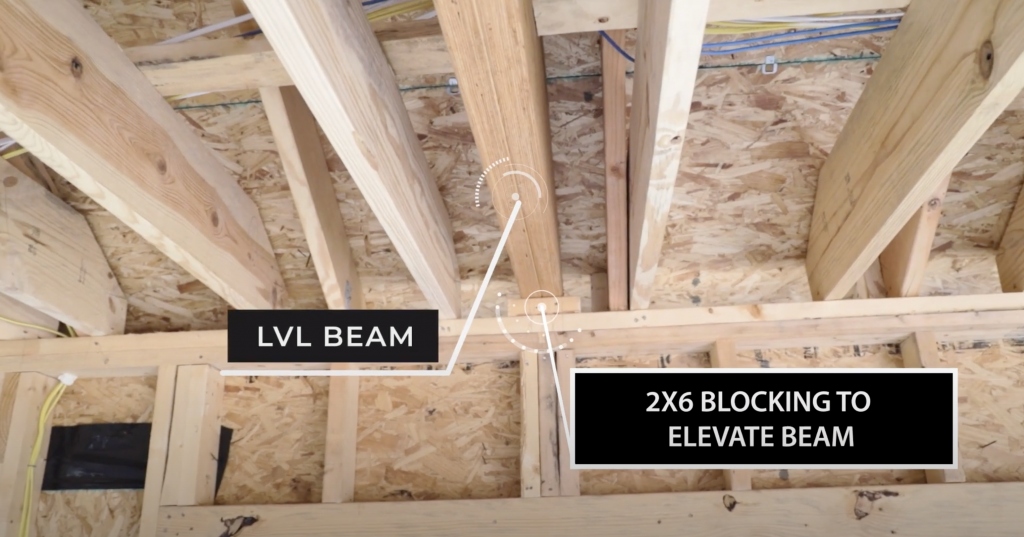
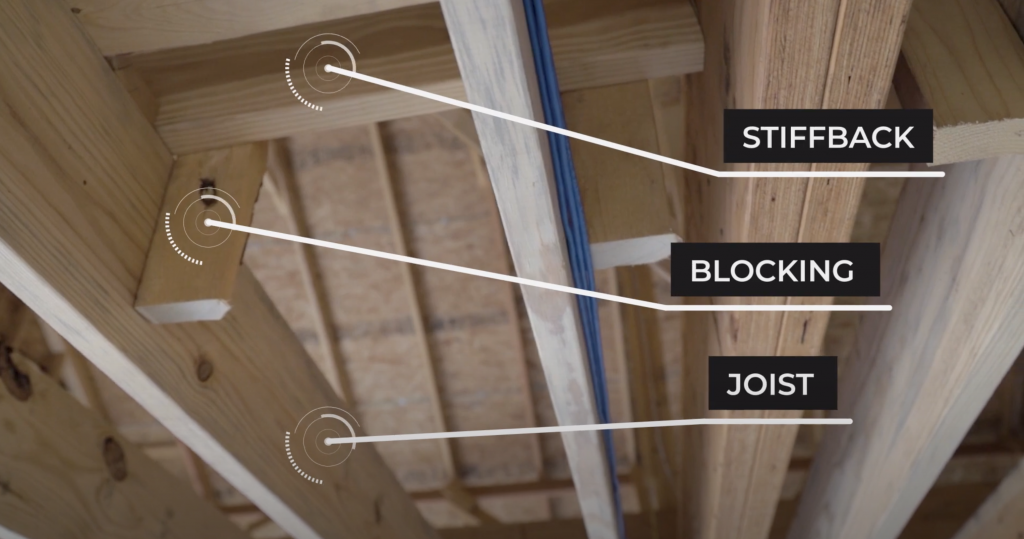
This is a good size garage and you’ve got a lot of open span areas. When we do the open spans we have the beams that support the weight, so we have the LVL coming through the middle of it and we elevate the LVL off the plane of the ceiling that way if we have a deflection of that LVL beam it won’t get into the plane of the ceiling. Anytime you have a span of over about eight feet you want to be sure and put a stiff back on the joists. This is almost 20 feet on the span if you look up you’re going to see that the stiff back goes across, but all the joists are blocking the stiff back using wood blocking that prevents that joist from pulling loose from the stiff back.
